
Photography at night in an urban setting presents both a challenge and an opportunity for photographers seeking to capture the unique essence of cities when they come alive with artificial light. City-at-night photography, often associated with long exposures, vibrant colors, and strong contrasts, requires a distinct understanding of technical and artistic elements. To achieve compelling night photographs in a city, one must carefully adjust exposure, manage lighting conditions, choose appropriate gear, and creatively use perspectives. This article provides in-depth, trustworthy insights into key techniques that elevate night city photography to a professional level.
Understanding Exposure in Low Light
Proper exposure is the foundation of effective night photography. When shooting in low-light conditions, the interplay between shutter speed, aperture, and ISO becomes critical. At night, light levels are significantly reduced, demanding the right balance to keep images clear and noise-free.
- Shutter Speed: Longer shutter speeds allow more light into the camera, essential for nighttime scenes. However, any movement, even from minor vibrations, can blur the image. Use a tripod to maintain sharpening during exposure times ranging from 1 to over 30 seconds.
- Aperture: Selecting the correct aperture balances depth of field with light intake. A wider aperture (e.g., f/2.8) admits more light but may reduce sharpness in background elements. A mid-range aperture like f/8 often strikes an ideal compromise.
- ISO: Raise ISO only as needed. High ISO settings (above 1600) may introduce noise or grain, though modern cameras do handle this better. It’s generally advisable to shoot with lower ISO when using a tripod.
Essential Gear for Night Shoots
Night photography places specific demands on your equipment. While high-end gear offers advantages, even modest setups can yield excellent results if used properly.
- Tripod: A sturdy tripod is non-negotiable. Keeping your camera stable during long exposures is crucial for sharp images. Lightweight carbon fiber tripods are popular for their portability and strength.
- Camera: Cameras with strong low-light performance, such as full-frame DSLRs or mirrorless systems, provide better dynamic range and noise control.
- Lenses: Fast lenses (with apertures from f/1.4 to f/2.8) are beneficial. Prime lenses often offer better optical quality in low light than zooms.
- Remote Shutter Release: This tool helps prevent camera shake during long exposures. Alternatively, use the camera’s built-in timer for similar results.
Mastering Composition After Dark
At night, composition takes on added complexity due to contrasts in light and shadow, but this can enhance visual interest. Cityscapes offer a variety of elements that play well with nighttime composition techniques:
- Leading Lines: Streets, bridges, and railway tracks can lead the viewer’s eye into the frame. Position these lines to draw attention to a focal point, such as a building or monument.
- Framing: Use architectural elements like windows, arches, or alleyways to frame your subject, isolating points of interest amid visual chaos.
- Reflections: Puddles, glass surfaces, and rivers reflect artificial lights beautifully at night, adding symmetry and dynamic lighting effects.
Don’t overlook negative space. Shadows and empty areas can lend mood and contrast to busy urban scenes. Every element in your composition should serve a purpose, guiding the viewer’s attention or reinforcing the overall theme.
Color Temperature and White Balance
Cities at night are flooded with lights of various temperatures—from the cold blue of LEDs to the warm orange of sodium-vapor lamps. Adjusting white balance is therefore essential:
- Custom White Balance: Manually setting the white balance or using a gray card ensures better control. Auto white balance may not register artificial lights accurately.
- Post-Processing: Shooting in RAW format lets you finetune the white balance during editing without degrading image quality.
- Creative Choices: Slight shifts in white balance can dramatically change mood. Cooler tones highlight solitude; warmer hues suggest nostalgia and comfort.
Mastering color temperature not only ensures technical accuracy but also enhances storytelling by matching the color palette to the desired emotional tone.
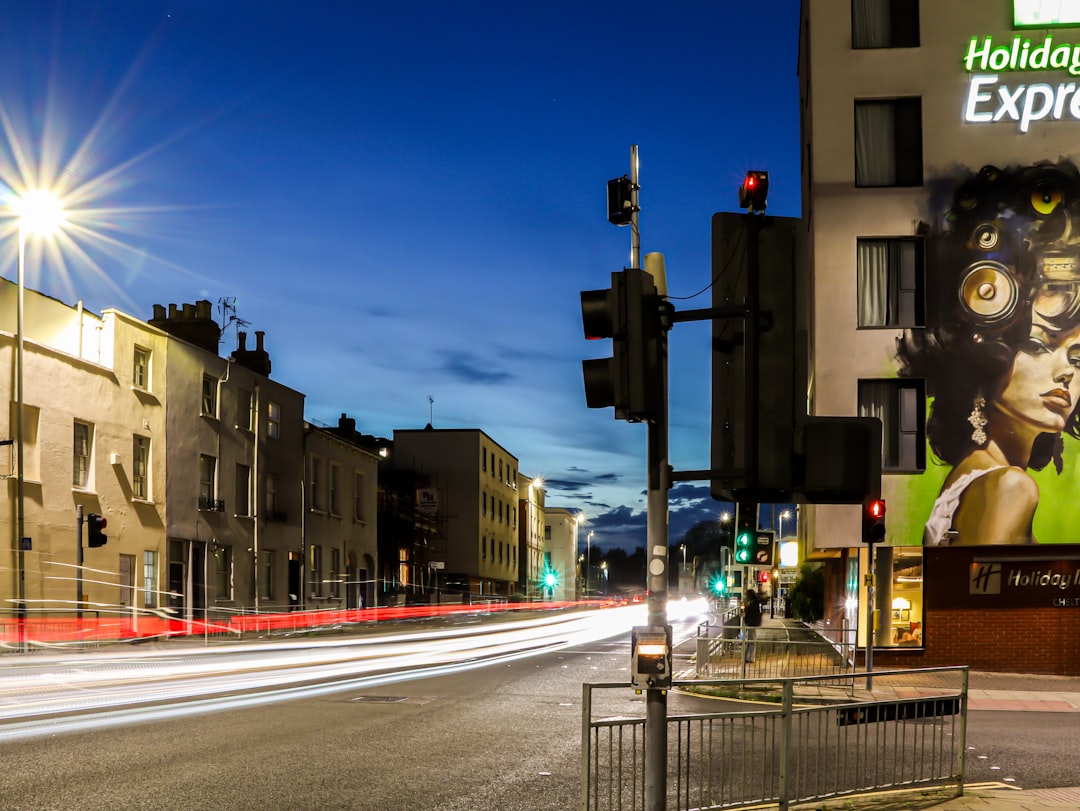
Long Exposure Techniques
Long exposure is perhaps the signature technique of city-at-night photography, turning moving headlights into trails and water into polished mirrors. To perform this effectively:
- Use Manual Mode: Manual settings allow full control over shutter speed, aperture, and ISO—necessary for balancing light and motion blur.
- Incorporate ND Filters: Neutral density filters allow for longer exposures even when artificial lights are bright, preventing overexposure.
- Track Movement: Position yourself strategically near dynamic elements like traffic, metro lines, or walking commuters to capture intentional motion blur.
Experiment with exposure durations—from 5 seconds to several minutes—and observe how changes affect the texture and energy of the final image.
Spot Metering and Light Management
Spot metering helps achieve better exposure by measuring light at a specific point in the frame. This mode is particularly useful in high-contrast night scenes where the average metering modes might underexpose or overexpose due to uneven light distribution.
Use exposure bracketing to capture multiple versions of a scene at different exposure levels. This can later be combined in post-processing to create HDR (High Dynamic Range) images that retain detail in both shadows and highlights.
Focus Techniques in the Dark
Autofocus systems struggle in low light. Techniques to achieve proper focus include:
- Manual Focus: Use live view and zoom in for precise control. Focus peaking (if available on your camera) assists in highlighting areas in focus.
- Use Bright Spots: Focus on high-contrast areas like street signs or lit windows and recompose if necessary.
- Hyperfocal Distance: This method ensures maximum depth of field by focusing at a specific distance, benefiting landscape-style city shots.
Consistency is key. After focusing correctly, avoid changing focal lengths or moving the camera to maintain sharpness throughout your shoot.
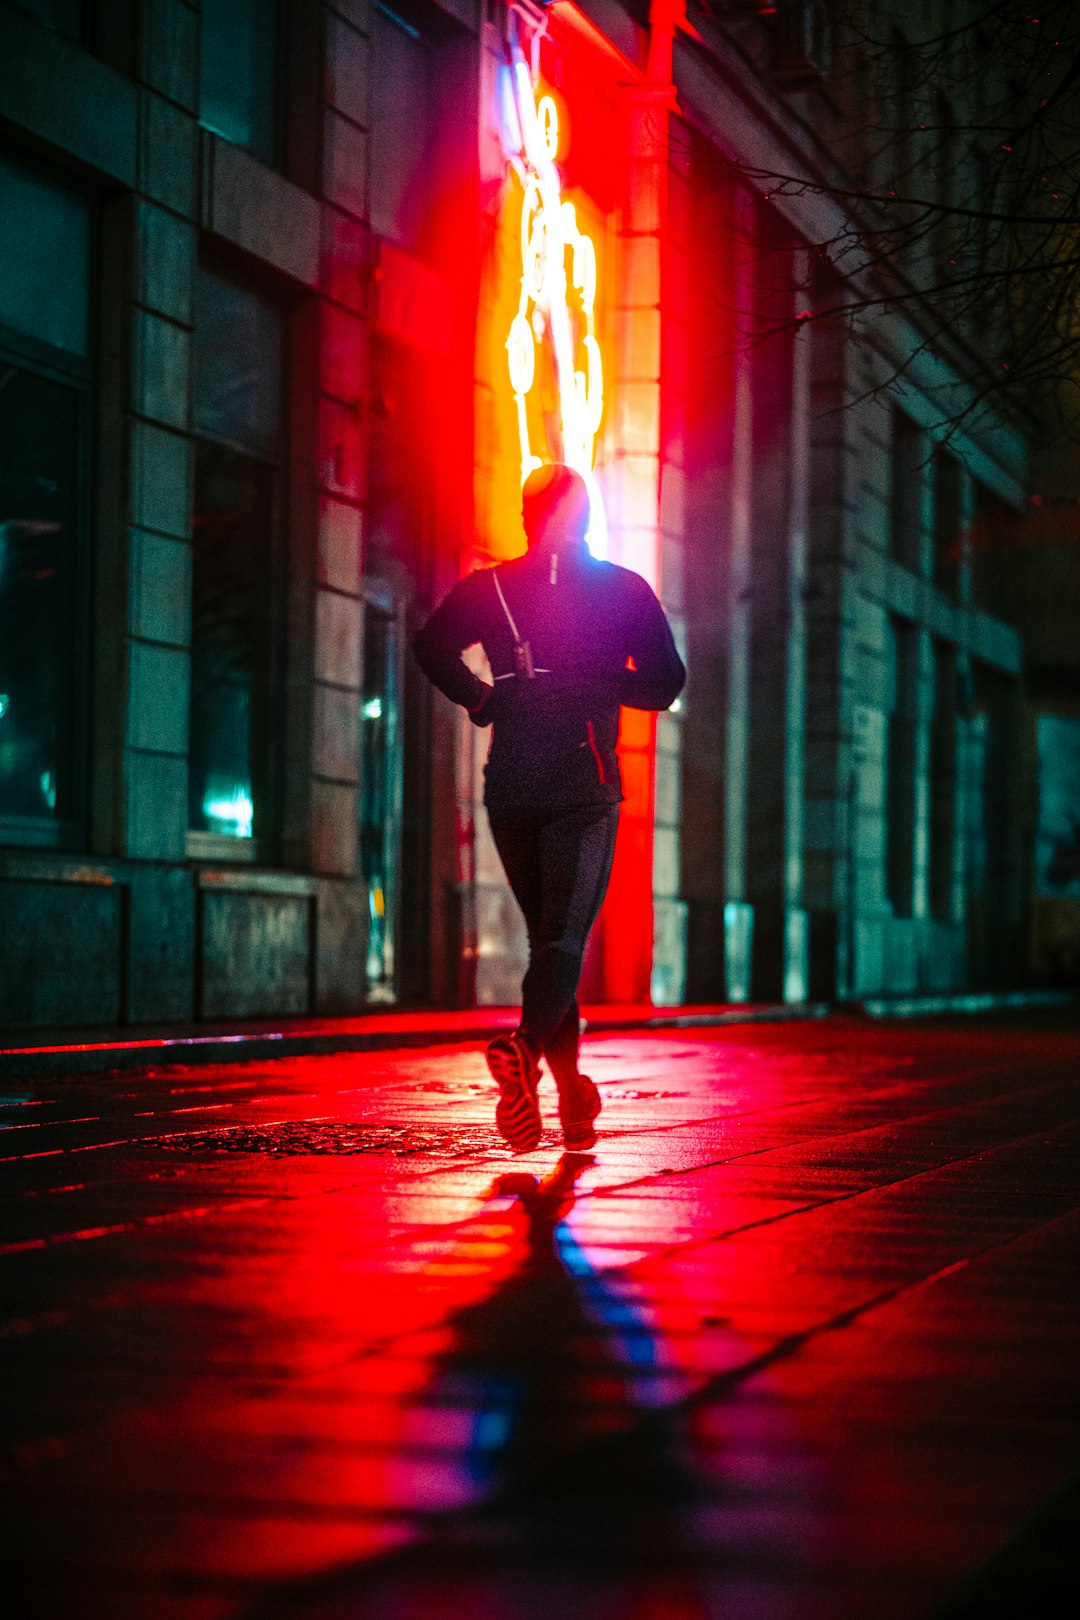
Capture the Atmosphere: Storytelling at Night
Great city-at-night photography goes beyond aesthetics; it captures mood, rhythm, and narrative. The silence of empty streets, the rush of nightlife, or the layered lights of passing traffic can all be storytelling devices.
- Look for human presence: A lone pedestrian or a street performer can add emotional weight.
- Highlight contrasts: Showcase areas where commercial neon clashes with residential dimness to reflect urban tension or harmony.
- Embrace the unexpected: Fog, rain, or nighttime events can add drama and authenticity.
Post-Processing and Final Touches
Editing allows photographers to refine their vision. While restraint is advised, certain adjustments can significantly enhance night photographs:
- Noise Reduction: Use software like Lightroom or DxO PureRAW to reduce noise without major loss of detail.
- Contrast and Highlights: Boosting contrast while carefully managing highlights can make city lights pop against night skies.
- Sharpening: Subtle sharpening brings out architectural features and textures.
- Color Grading: Apply unified color tones to amplify emotional impact, such as teal and orange for a cinematic look.
Always examine your image at 100% magnification before finalizing it, ensuring that details hold up under scrutiny, especially for large-format prints or professional presentation.
Conclusion
City-at-night photography is an enriching genre that bridges technical expertise with creative vision. To capture the urban spirit after dark, one must be prepared, patient, and perceptive. By mastering exposure, harnessing the right gear, thoughtfully composing scenes, and editing with intention, photographers can produce stunning images that transcend documentation and enter the realm of expressive storytelling.


